Lightroom “edit in” application, which can extract camera generated preview image from a RAW file. Exiftool is used for extraction and it must be installed separately.
Currently supports Mac OS X only!
Download
Get RAW In-Camera Preview Extractor 0.1.705
Introduction
While Lightroom does great job with RAW processing, the results are sometimes quite different from the image we see on the camera’s display. By default, there is no way to directly view this image from Lightroom, though cameras do actually save JPEG preview image inside the RAW file. New users are often puzzled by these previews, since Lightroom does use them if you select “Embedded Preview” on import, but once you highlight the photo, the “camera colors” are replaced by Lightroom rendition. Once the preview is updated, the camera preview is gone forever!
This application allows you to easily add the JPEG preview image to Lightroom catalogue by simpling right-clicking the photo and selecting Edit In application.
Depending on the camera model, the preview might not be full resolution and the quality can be lower than dedicated RAW+JPEG shooting. But for matching RAW photo with what you saw from the camera display, it is typically fine.
Installation
First, you should download and install Exiftool installation package from http://www.sno.phy.queensu.ca/~phil/exiftool/
(any Exiftool distribution is ok, as long as it is installed in the profile path)
Open Lightroom preferences, select “External Editing” tab. Under “Additional External Editor”, there is an row named “Application”, click “Choose” on it. Navigate to “capturemonkey.com RAW In-Camera Preview Extractor” and select it. File format should be “JPEG”, other settings have no meaning in this context. Open preset popup menu, select “Save current settings as new preset”. Enter “capturemonkey.com RAW In-Camera Preview Extractor” as name, and click Create.

NOTE: Make sure you are using Lightroom’s default naming template (“Edit Externally File Naming”). The extractor can only work with Filename-Edit named files, dialog should show example: IMG_0002-Edit.psd
Now, go to library view, select a RAW photo and use Photo -> Edit In -> capturemonkey.com RAW In-Camera Preview Extractor. Lightroom will now create a JPEG image of the RAW file, which is then replaced by the extractor application with the preview image from inside the original RAW file.


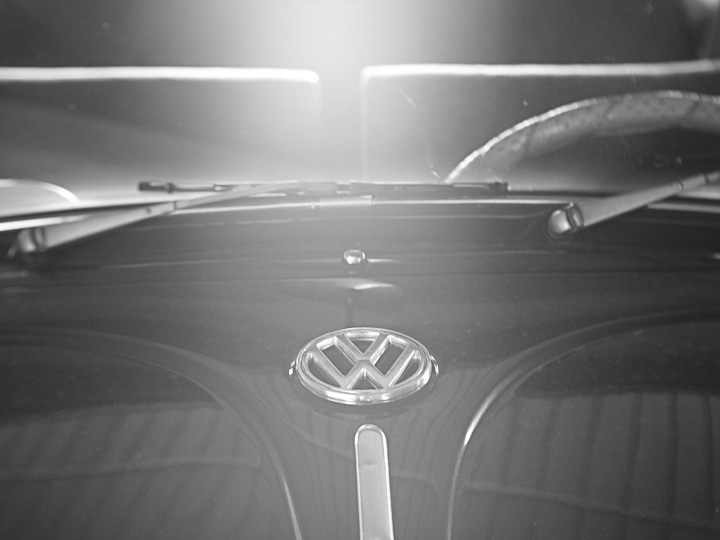
Above, you can see a monotone image rendered by E-P1. It was extracted from original ORF file (the colorful one), the camera was set to monochrome while shooting.