
Lately, I’ve been interested in infrared photography (I even modified by E-P1 for full spectrum use), and I’d like to share one of my special tricks for other Lightroom users interested in infrared photography.
I have several IR filters for blocking visible lights, e.g. 550nm, 720nm and 950nm filters. The 950nm filter produces grayscale IR images, but the other filters do produce fake colors, which sometimes make the result much more interesting.
Here’s an example of a shot with 550nm filter, processed as follows, from left to right:
- Daylight white balance. The filter has a heavy orange tint
- Custom WB, autotone. The tint is gone and sky now shows as dark yellow.
- Profile: RedBlueSwap, Custom WB, autotone. Sky is now blue and you can start adjusting photo further.

While this is an old trick in Photoshop, you cannot do this in Lightroom by default. In order to create this effect, I’ve built special Camera Profiles which have color matrices with reversed components. The profiles were created using dcpTool by Sandy McGuffog.
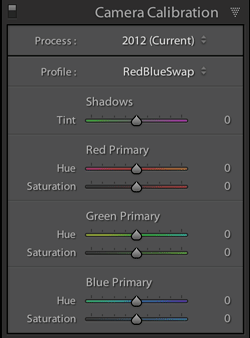
After installing the custom profiles, you will have a new option in Lightroom’s Camera Calibration Profile pulldown menu: RedBlueSwap. Selecting this option will reverse the red and blue channels and hopefully you can skip the slow “Edit in Photoshop” step.
Installation
Unzip the zip file and copy redblueswap folder to Camera RAW’s profile folder, which is located under your home folder:
Mac OSX:
/Users/yourname/Library/Application Support/Adobe/CameraRaw/CameraProfiles
Windows:
C:/Users/yourname/App Data/Roaming/Adobe/CameraRaw/CameraProfiles
After copying, you need to restart Lightroom before the new profiles are available.
Download
Sep 20 2015: Updated to match cameras supported by Lightroom 6.1.1